Pin It
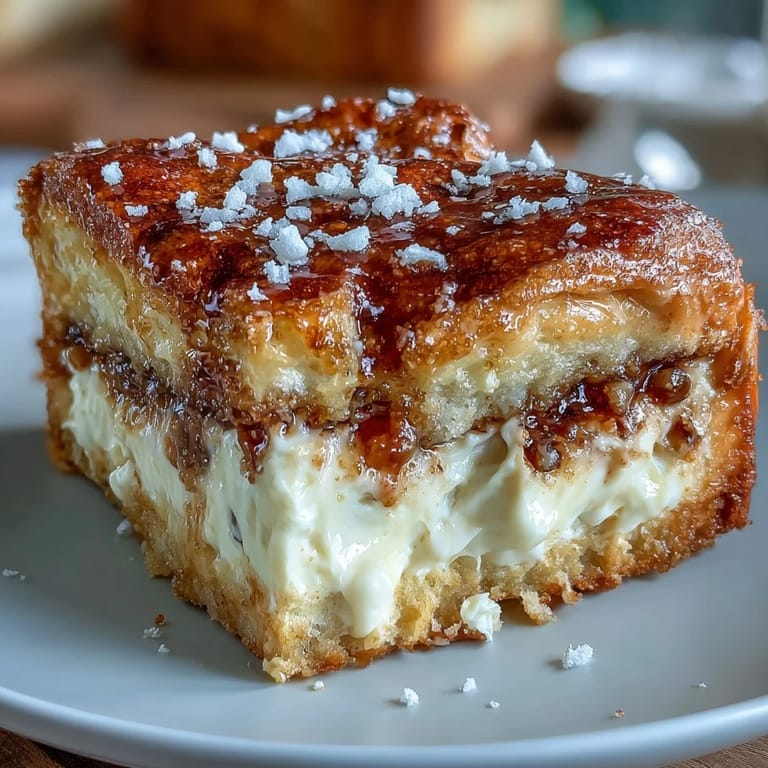
 The scent of butter and cinnamon drifting from the oven always reminds me that dessert is something you can hear before you see. Last spring, craving something easy but festive for a neighborhood Cinco de Mayo potluck, I decided to try these sopapilla cheesecake bars. Layer upon layer, the soft dough and creamy filling came together almost as an afterthought, but the aroma felt like a promise. By the time I pulled them from the oven, people were popping into the kitchen to ask what was making everything smell so good. That's when I knew this recipe would become a regular in my dessert rotation.
I can still picture the moment when someone knocked on my door just as I was pulling the pan from the oven, the melted butter bubbling at the corners. The whole house felt a little cozier with that cinnamon cloud hanging in the air, and everyone found a reason to wander into the kitchen for a taste test before dinner was even served.
Ingredients
- Refrigerated crescent roll dough: Nothing beats its flakiness and ease—pressing it into the pan wakes up memories of effortless desserts made on rushed evenings.
- Cream cheese (softened): You’ll want it fully softened so it blends super smooth, avoiding lumps in the luscious filling layer.
- Granulated sugar: This sweetens the filling and creates that classic caramelized top—don’t be shy with sprinkling.
- Vanilla extract: Just a dash deepens the creamy flavors; I learned a little extra splash never hurts.
- Unsalted butter (melted): Butter poured on top brings those bakery-style golden edges, trust me, use it all.
- Ground cinnamon: Warm and fragrant, it pulls everything together and lets the topping sing.
Tired of Takeout? 🥡
Get 10 meals you can make faster than delivery arrives. Seriously.
One email. No spam. Unsubscribe anytime.
Instructions
- Get the oven ready:
- Set your oven to 350°F (175°C) and butter a 9x13-inch pan so nothing sticks later on.
- First dough layer:
- Unroll the first crescent dough and press it flat into the baking pan—don't worry about tiny seams, they bake together.
- Whip the cheesecake filling:
- Beat cream cheese, 1 cup of sugar, and vanilla until creamy and cloud-like; scrape the bowl a couple of times for good measure.
- Spread the filling:
- Gently spoon the cheesecake layer onto the dough, smoothing it out so every corner gets a bit.
- Add the top dough:
- Unroll the second crescent dough and lay it over the filling—small gaps are okay, patch them gently if needed.
- Pour on the butter:
- Drizzle the melted butter generously over the whole surface; use a spatula to spread it to every edge.
- Cinnamon sugar shower:
- Mix the remaining sugar and cinnamon, then sprinkle with abandon over the buttery top for a glorious, crackly crust.
- Bake:
- Slide it into the oven and bake 28–32 minutes until golden and set—listen for that bubbly sizzle at the edges when it’s nearly done.
- Cool and serve:
- Let it rest 30 minutes, resisting the urge to cut too soon; bars slice cleanest once set, and you can sneak a piece warm or cold.
 Pin It
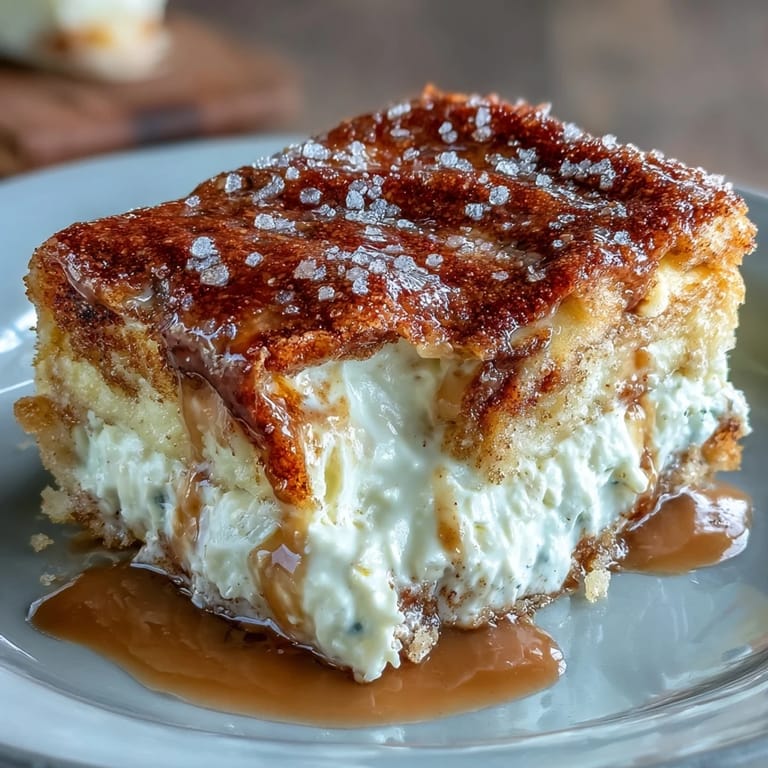
 Watching friends sneak a second (or third) bar before the night ended made me realize how much joy there is in straightforward, old-school desserts. These bars have turned up at picnics, birthday parties, and weeknight dinners—each time, they’ve started new stories.
How to Make Them Perfect for Any Occasion
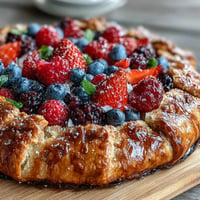
I once tossed in a little lemon zest to the filling on a whim, and it gave the cheesecake a subtle brightness that made the bars vanishingly good in spring. If you’re feeling fancier, garnish with a handful of berries right before serving or drizzle on honey for a glossy finish. Flexibility is this recipe’s hidden secret, and every occasion is a chance to tweak it one more time.
Simple Swaps and Serving Ideas
On a recent day, I swapped in low-fat cream cheese for a lighter bite, and no one suspected a thing, not even the picky eaters. These bars love a cold fridge and are just as great straight from the pan as they are plated prettily for guests. Stack them up high, dust with extra cinnamon sugar if you like, or slice them small for one-bite treats.
Make-Ahead Magic and Storage Tips
Since these bars chill beautifully, I usually bake them the night before, letting the flavor settle and the texture set up perfectly. They store in the fridge for a few days (if they last!), making them ideal for busy weeks or unexpected company.
- Cover tightly with foil or plastic wrap to keep them soft.
- A quick 10-second zap in the microwave brings back the fresh-baked magic.
- Remember to let them cool completely before cutting for the cleanest slices.
 Pin It
 No matter how many times I make these cheesecake bars, they always manage to bring a smile to the table. I hope they spark new kitchen memories for you too.
Recipe FAQs
- → How do I prevent a soggy bottom?
Press the bottom layer of crescent dough firmly and spread the filling evenly to avoid pockets of moisture. Bake until the edges are golden and the center is set; underbaking leaves excess moisture. Allow a full 30 minutes of cooling before slicing so the filling firms up.
- → Can I use puff pastry or homemade dough instead of canned crescent dough?
Yes. Puff pastry will give a flakier texture while homemade crescent-style dough works too. Adjust bake time if layers are thicker or thinner, and watch for a golden top and set center as your doneness cue.
- → What are good substitutions for the topping?
Instead of melted butter, try ghee or melted coconut oil for a slightly different flavor. Swap some granulated sugar for light brown sugar to add depth. For a lighter finish, dust with cinnamon and powdered sugar after baking.
- → How should I store and reheat the bars?
Store cooled bars covered in the fridge for up to 4 days. To freeze, wrap portions tightly and freeze up to 2 months; thaw in the fridge overnight. Reheat gently in a low oven (300°F / 150°C) for 8–10 minutes or warm briefly in the microwave.
- → Why did the center sink or crack?
Sinking or cracking usually comes from overmixing the filling or rapid temperature changes. Beat the cream cheese until smooth but avoid excessive air incorporation. Bake until just set; residual heat will finish cooking as it cools gradually.
- → Any tips for clean, even slices?
Chill the pan for at least 30 minutes before slicing to firm the filling. Use a sharp knife wiped clean between cuts, or warm the blade under hot water and dry it for smoother edges and even portions.